‘One night stand’ car camping
As we were travelling by car and camping along the journey up the coast we decided against setting up a tent each night, and went for rolling out a swag instead. We have found swags to be the pinnacle of camping ease and comfort, with their thick foam mattresses and set up time of about 2 minutes. They are especially good when you’re unlikely to need daytime shelter from rain, and when you’re moving on each morning. On the flipside, swags are pretty large bits of kit. Ours is a double, measuring about 140cm wide and 45cm deep when rolled up.
Long stay mainland car camping
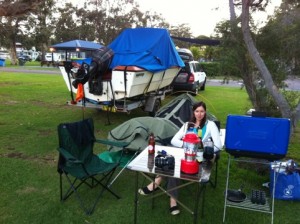
For longer term car camping on the Whitsunday mainland, we have a more traditional set up – better for a longer stay, for the rain that can persist here at times, and for needing daytime shade. We’ve got a two man tent with the mattress from the swag rolled out inside. The tent also has a little vestibule area – we put a tarp down and have most of our food and camping gear stored there. Outside we constructed a sun/rain shelter with a heavy duty tarp, sturdy but lightweight poles and strong guys. Under this we have our two chairs, table, stove and stove stand. This also functions as our ‘office’ whilst we’re here.

Island camping by boat
Our initial plan was to basically pack up our mainland camp and take it with us on the boat to the islands, minus a few things. We did a trial on Jervis Bay with the camping gear in the boat and it seemed ok, but this was with only some of the 60 litres of water and 40 litres of fuel one needs to take to a deserted island. The rule of thumb is that you should take 5 litres of water per person per day, plus extra for another 3 days – just in case the weather turns and you need to stay put longer than intended.
As we made our final preparations for our trip, the amount of camping gear was weighing on our mind – which isn’t how it should be. On such trips, you want to be focused on the sights you will be seeing, the wildlife, the experience… But we knew that having too much stuff would detract from all that, so started shaving things off the list.
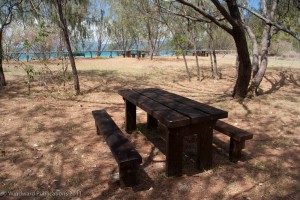
The table and chairs were the first to go. Whilst they are quite light, they are bulky – and many of the island campsites have shady picnic tables provided by Parks. Then it was the stove stand. A very useful bit of kit when you’re in one place or even just car camping overnight – but annoying to carry, with hooks that seem to catch on everything.
We scaled down our toolkit (ultimately to our detriment on our first day – but it was so big and heavy). We each packed a small lightweight bag with just a few clothes, trainers, diving booties and snorkels. I even removed my novel from my bag – it’s was doorstop that I hadn’t even started yet, and if we were going to read, we wanted to continue soaking up The Whitsundays Book and Ray Blackwood’s exhaustive tome, The Whitsunday Islands – An Historical Dictionary.
Island camping v1.0
So after a long and difficult first day on the water – which we won’t go into here but let’s just say that schlepping the camping gear around wasn’t the worst part of it – the lengthy set up of the weighty and voluminous camping kit definitely sapped our time, physical energy and peace of mind.
Most obvious to remove from the kit straight away was the 35 litre fridge/freezer. We had intended to leave this on the boat in freezer mode, with a few ice packs and some frozen meat and milk inside. As the boat would be anchored within easy reach (via Anthony’s Continuous Loop Anchoring Technique – or CLAT as he has coined it), we would pull her in each day to put a fresh frozen ice pack in the esky and re-freeze the thawed one.

‘Ultralight camping’ inspiration
To get some ideas for how to further downsize our kit, we first turned to Google. Typing in ‘lightweight camping kit’, we expected to find light camping products in online stores, and maybe some lists of kit from expert bush campers out there.
What we found was a whole movement of people across the world into what is called ‘ultralight camping’ or ‘ultralight backpacking’. Many of them seemed to be in the US, but there were plenty more in the UK, Europe and a few in Australia. The majority were keen bushwalkers going out on multi-day hikes. Having to carry everything on their backs had led to serious depth of thought and discussion about what kit is really necessary, cutting edge lightweight gear, and old tricks like cutting your toothbrush in half. All took under 10 kilos of stuff in their packs – some were able to cut this down to as low as 4 kilos.
An example of what we found are these very insightful and detailed pages, put together by Roger Caffin of the Confederation of Bushwalking Clubs NSW. Who knew there was so much to consider in the design and purchase (or build) of the perfect lightweight tent? One page led to another, from a dissertation on stove types to another about fuel efficiency. We also came across this great story of a ‘heavyweight backpacker’ in the US who volunteered to be kitted out by some ultralight folk and sent off to trek the ‘Lost Coast’ of California for five days. When you have ten minutes to spare it’s a fun read.
Somewhat defeated by the hitherto-unrealised complexities of a seemingly simple thing like choosing a lightweight stove, we were nonetheless inspired. We started to go through our kitchen gear, looking at every item critically to see if we could do without it. The second saucepan was an easy thing to discard (we already have another, and a small frypan). The third plate, the extra cups, the veg peeler. The bulky folding pouch that holds all the utensils and cutlery. Bowls were put aside as we only really use them for muesli, and the plates were bowl-like enough to suffice. And so on.
We decided we also didn’t really need the 80W folding solar panels we had brought with us. Whilst the idea behind them is sensible – to have a backup way of recharging the boat battery if it should go flat – we already had an insurance policy for that in the form of a second battery. Batteries are incredibly heavy anyway, so also having these panels weighing in at about 20 kilos, and being bulky to carry and store felt like something significant we could shed. However, when we are stranded on a remote island with both batteries flat, we felt a small tinge of regret having left this bit of kit on the mainland.
We also decided to leave our mainland campsite set up whilst we went to and from the islands. Most of the stuff is rather bulky, and the time and effort involved in packing it up and repacking it every few days is not worth the small saving in site fees.
After making these adjustments to our kit we decided to seek counsel from those locally who really know how to pack light for camping on these islands – Hayley and Neill Kennedy of Salty Dog Sea Kayaking.
Advice from the wise
Hayley agreed that campers often overestimate or underestimate what they need to take for island camping. Underestimating the amount of water is a common mistake, and packing things that aren’t really appropriate for a tranquil National Park wilderness experience is another – like the big ghettoblaster one group of teenagers wanted to take.
She wisely cautioned against feeling the need to spend a fortune on lightweight gear, but added that some things are relatively cheap and make your life a lot easier. For example, lightweight and flexible water bladders are much more space-efficient and easier to pack into kayaks, as are zip-lock bags for food storage as opposed to tins or jars. A small head-torch for finding your way around a pitch black campsite is also cheap, light and handy.

Image via Salty Dog Sea Kayaking
Food was also another area for sage advice, with Hayley explaining that people unfamiliar with living in a tropical climate often overestimate how long fresh food lasts for. Things like cheese or chocolate melt within a few hours, and vegetables and bread also have a limited life span (a third to half as long as in cooler climes) and are bulky due to their water content. Muesli, flatbreads and dried/packet provisions are the go – and of course making sure it’s all stored securely in a sturdy box so prying paws, teeth and beaks can’t get into them. Even a muesli bar wrapper stashed inside a lifejacket will invite unwelcome animal attention, with mice able to nibble through and leave holes in their wake.
Lightweight food supplies
Enthused, we went to check out the dried food supplies in the local supermarket. It was strange looking so closely through all the shelves we normally walk straight past on our way to the veg, dairy or meat. As you can imagine, there’s a lot of what looks like ‘junk’ – two minute noodles and so on – but I guess they’re quick to make and satisfying enough when you’re hungry.

We also found things that appealed more to the cooks in us – things like falafel mix, polenta, or powdered eggs.

We bought a few things to try – tuna in a packet rather than a tin, and some ready-made Indian lentil packets.
Choosing the right gear
In preparing for our island camping expedition we needed to replace some items in our mainland camping kit: a small tent, a much thinner sleeping mat and a one-burner stove. To get advice on what lightweight options there are, without breaking the budget, we went to see Michele Wright at the Whitsunday Caravan, Camping & Trailer Centre.
We talked about the super lightweight hiking tents, the kind I’d been reading about online. As well as being much more expensive than your average tent, Michele’s advice was that they can be fiddly to put up and they are very low to the ground – really designed for those who just need a small space to lie down in, and not much else. For typical island campers, she advised a more standard dome tent – but emphasised the importance of ensuring you check that the model you choose is fully waterproof and has sandfly-proof ‘No-see-um’ mesh. Some of the entry level tents don’t meet these criteria – which in the Whitsundays could leave you an unhappy camper. Again, your age and tastes might dictate you want a slightly taller model in which you can stand up straight and these days that doesn’t necessarily mean you must also have a larger overall footprint.
We ended up choosing a tent just up from entry level – a small 2-man compared to our current tent, and with large mesh ‘windows’ on all four sides allowing cross-ventilation – something I hadn’t seen before, and perfect for this climate.

Sleeping mats were next. Downsizing from our bulky swag mattress, we were looking for something compact but comfort was still important. With mats you really have to test them out – don’t just look at them because your age and/or creakiness in particular, will govern how well you like the various options . Any reputable camping store will encourage you to try things out, so don’t feel silly…

The double mat we found folds in half, then rolls up to around 25% of the size of the swag mattress, and maintains about 75% of the comfort which seemed a good compromise.
On the stove front, we got a very simple one burner we can sit directly on top of a small 1kg gas bottle. There are options for lighter disposable gas canisters, but the refillable bottle appealed more to my eco-sensibilities and last much longer per refill to boot.
Most importantly with any camping equipment, Michele reminds us that different gear will suit different types of people. What is right for you depends on what activities it’s intended for, your budget and comfort requirements. This means what you choose if you’re a young backpacker will most likely be different to an older couple or an ‘ultralight’ bushwalker.
Island camping v2.0
Equipped with more experience, knowledge and a few bits of new gear, we packed up for our second trip out to South Molle. It took a fraction of the time to pack up, and I’m hoping that our reduced kit will free up our energies for more important and exciting aspects of the experience.
We still couldn’t handle the idea of leaving our coffee machine La Sorrentina behind though… maybe we were hanging on to a luxury that we shouldn’t, or maybe we’re addicts, but we were both of the opinion that great coffee is an experience-enhancer (nay, an essential), and including La Sorrentina in our kit was worth leaving other things behind for.
We hope this article has helped you in your quest for the right camping kit for you.


